
This year my sister and I decided to follow a theme for our pumpkin carving project. And what better theme than one of the greatest shows on television?!
Since we have a long time to wait until GoT comes back, we are bringing GoT to life on our pumpkins!
I decided to honor my favorite GoT house, House Stark, by carving its house sigil and its well known phrase “winter is coming“. My sister decided to honor the house we love to hate, House Lannister, by carving the house sigil (Let’s just say, she though it would be simple). I know you’re wondering, what about House Targaryen? Hello, Mother of Dragons- Khaleesi of the Great Grand Sea- Queen of Meereen- Queen of the Andals/The Rhoynar/and The First Men blah blah blah (way too many titles)? Well, sorry to disappoint. House Targaryen’s sigil is WAY too difficult for us. We are not professional here.
Anyone can carve a pumpkin! Not only is it fun, it’s also a bonding experience (for you and your pumpkin haha- just kidding).
What you will need:
- Pumpkin(s)
- Tablecloth (great for easy and quick clean up)
- Stencil or pattern
- Pumpkin carving kit
- Snacks and water (If you’re a perfectionist like I am then this will take some time)
- Spotify (helps the time go by quicker)
- Tape
- Pencil
- Container

Step-by-step guide:
- Cut the top part of your pumpkin. Make the hole big enough for your hand to comfortably take out the pumpkin guts. Also, *VERY IMPORTANT* cut the the top off in an angle- so once you’re done the top part will sit on top rather than fall in.
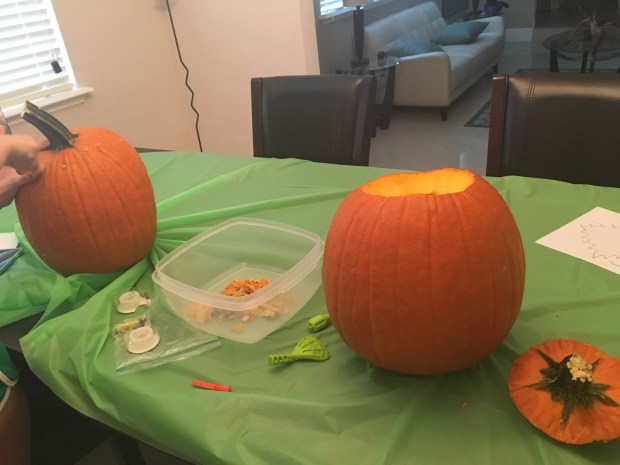
- Scoop out ALL of the pumpkin guts. Make sure to leave your pumpkin nice and clean. Scrape the sides, bottom, and pocket under the opening really well. Set aside the seeds and the pumpkin guts for future use (toasted pumpkin seeds, pumpkin pie, etc.).
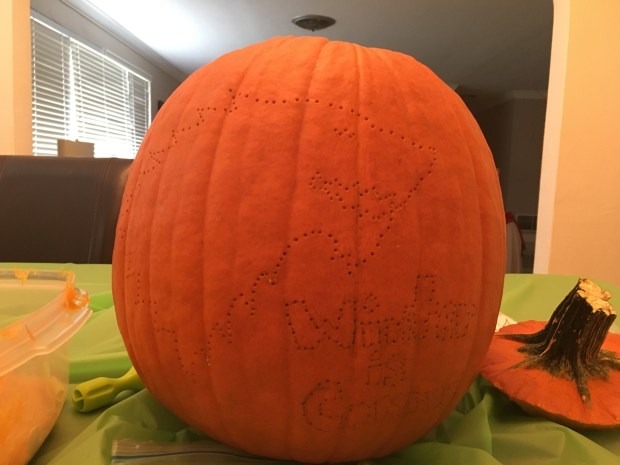
- Tape your stencil/pattern to your pumpkin. Try to tape it as tight and wrinkle free as you can.

- Poke holes outlining the stencil/pattern. The goal of this step is to poke holes that you can successfully follow with the saw. If you are doing words like I did, I recommend writing it with pencil and then poking holes outlining them.


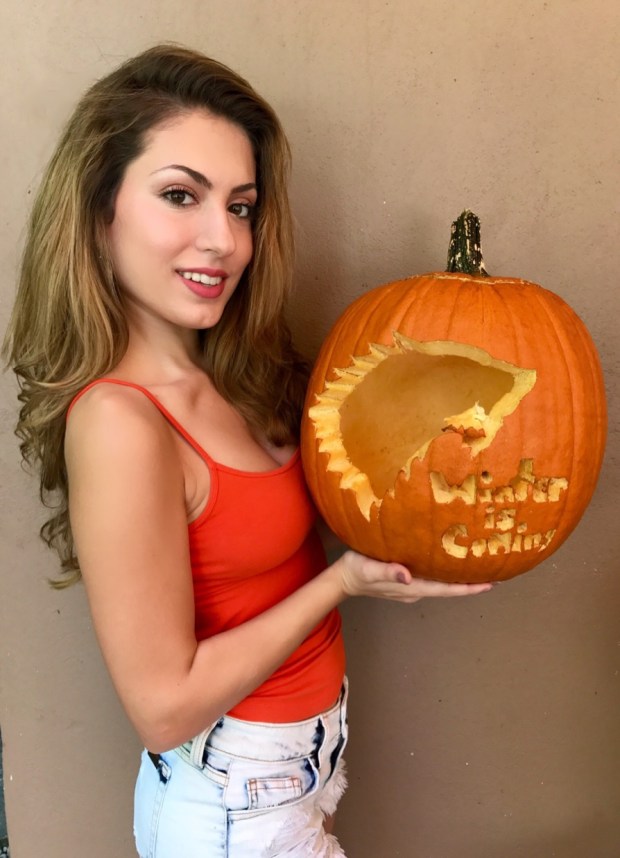
Using the saw from the pumpkin carving kit, follow the outline and push out the pieces. Be very careful with the delicate pieces that should not be pushed out. *TIP* If you mess up, you can always hold a piece together with a toothpick. I messed up the mouth of the Direwolf and I was able to hold it together with a toothpick. The kit also comes with a smaller saw for the more delicate and minuscule details.
The End Result


Get in the Halloween spirit and carve a pumpkin.
Let yourself feel like a pumpkin carving artist, enjoy it before it rots, and take plenty of pictures!

I LOVE this how to pump up the volume. And your blogs are perf. You never know what you are going to get. This how to was wonderful.
Thank you!
Ok.
Have to check the dryer, fokd some more, than I will settle in to watch the music video!!!!!
http://www.SheLovesToDoLaundry.com
LikeLike
Wow. Thank u. I will check out when I get home. so excited!!! @ bank now
http://www.SheLovesToDoLaundry.com
LikeLike